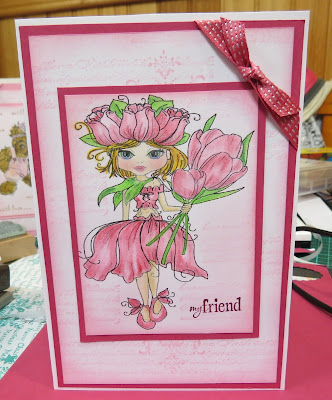
Tulip my Friend Card
You get great Specials on Tuesdays.
Cut out a peace of white card stock 23cm by 17.5cm, and then fold in half to form your card.
Then cut a peace of plain card stock in pink, 17cm by 11.3cm the second layer is a peace of white card stock, 16.5cm by 10.5cm, Once you have cut your first white peace that goes on top of your pink card stock, you must stamp the back of your white card using pretty in pink ink using a word background stamp and a scroll stamp. You can use any stamps you like then sponge around the edge with pretty of pink ink. Do not stick any of your Layers to your main card until we have finished making your four layers on your card and have put your ribbon on the top corner of your card, as you need to tuck your ribbon under your card so that you secure the ends.
Layer three is 11.5cm which is Pink Plain Card Stock. Your fourth Layer is the layer with your image on it. 11cm by 8cm I used my word stamp and I stamped a little around my image, and sponged around my fourth layer with Pretty in Pink ink. I stamped My Friend on the Front of my card.
I put a peace of ribbon on top corner of my as shown in my card. I then tied another peace of ribbon over top of my ribbon and trimmed, you only need to secure ribbon under each end of the card. Once you have all this done, you can then attach all your four layers to your main card. Just have fun.
My image is from Polkadoodle and is coloured in with my Derwent water coloured Pencils, I have added some shimmer with my Wink of Stella Pen.

No comments:
Post a Comment